![]() Once you have your WordPress blog up and running, you will want to add an email account to it. Why? If you want to make money from your blog, you will want to start to build a list of email addresses of your subscribers. Why? An email list allows you to engage more easily with your loyal band of subscribers. So, if and when you start to offer free gifts, e-books, or affiliate promotions to your readers, you can notify and target your loyal followers directly, and tell them all about it in an email.
Once you have your WordPress blog up and running, you will want to add an email account to it. Why? If you want to make money from your blog, you will want to start to build a list of email addresses of your subscribers. Why? An email list allows you to engage more easily with your loyal band of subscribers. So, if and when you start to offer free gifts, e-books, or affiliate promotions to your readers, you can notify and target your loyal followers directly, and tell them all about it in an email.
You won’t have to rely on them remembering who you are, and deciding to call in to your blog to see what’s happening. You can say, “Hey, get on over to my place and read my latest riveting article!” Who could resist? 
And…. once you have installed Feedburner (see Easy Guide How to Add Feedburner RSS Feed To Your Blog) you can link your Feedburner updates directly to your blog’s email account. This gives you the possibility of getting a Widget Code from Feedburner that allows you to put a ‘Subscribe to my blog via Email’ box on your site. Then your readers can choose to subscribe by email (please do….see box on the right  ) and receive updates straight into their own personal inbox! I know! It’s all pretty exciting, isn’t it! But moving on…….here’s how to do it.
How To Add An Email Account in cPanel
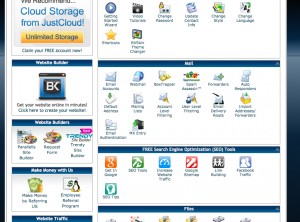
This is a task you are going to have to do via your cpanel – but worry not, friends, it’s really easy – no really. Log in to your web host account (Hostgator in my case) and you will see your cpanel:
Look for the section called ‘Mail’. At the top left (usually) of this Mail section you will see an icon called Email Accounts. Click on it.
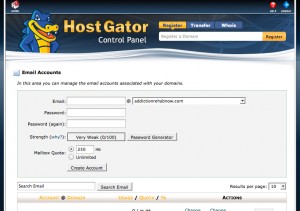
You will see a screen like this:
In the top text box, make sure that your correct blog name is selected (if you have more than one), and type in the name you want to use for your emails. It might be ‘admin’, or your real name – the choice is yours.
Create Your Account
Fill in your password, and click ‘Create Account’, and your new email account will appear below your sign up page, like the one above. Easy!
You will see the name of your email account, with various options (Actions) you can use. That is where you can see the amount of your email use-age, and options to change your password, or delete your account. On the far right, you will see an option called ‘More’ with a drop-down menu. Click on More, and click on ‘Access Webmail’.
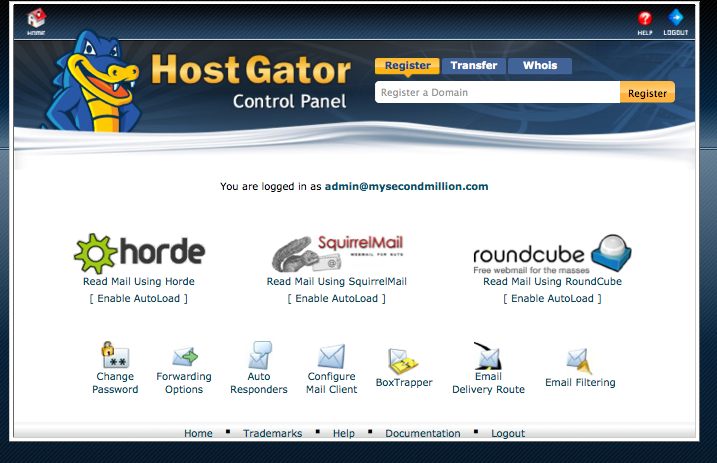
You will see a screen similar to this one, provided by Hostgator:
With my host, I have a choice of 3 programs to access and view my emails. Try all three and see which you prefer to use. Some of these webmail programs have more options than others. The choice is yours.
This is what you will see when using Squirrel Mail and your account is brand spanking new (empty):
All done! Congratulations! Job well done! Now……
Now, you need to take a quick breather, and then go over to your new Feedburner account, and link this new email account to Feedburner. That will allow you to add a Subscribe via Email sign up box on your blog – top right… , which will give your loyal subscribers (wonderful people) to subscribe to your blog via their own personal email account.
How that is done will be the topic of my next post Build Your List with ‘Subscribe to RSS via Email’


Pingback: Add Feedburner RSS 'Subscribe via Email' & Build List