 Hey, people! Great News – I’ve been quite (but never, very) clever…so now, I just have to share my latest discovery! Has anyone noticed my you-beaut Secure Website Logo at the bottom of my right hand sidebar?? Check it out. All right… now we’re cooking with Gas!
Want to feel really clever? Of course you do. Buckle up friends, today I can bring to you…my fully automated, syncopated, bright, and shiny new…Secure Membership, Registration, and Subscriber List Plugin! Really? Yes! Really:
Introducing…..drum roll please, Gladys…..The S2Member Plugin! And thanks to Ana Hoffman of Traffic Generation Cafe for tipping me off to this really cool add-on for websites.
This article tells you how to synchronize all the different entry points to your Lists into one, seamless, automated system using this S2Member Plugin.
This S2Member Plugin also allows you to securely manage and integrate your Subscribers and Members with PayPal and Clickbank billing system software. This article won’t cover PayPal and Clickbank Integration. It will only cover the Installation and Setup of the S2Member Plugin, plus: how to automatically use the S2Member Plugin to Integrate Registered User Signups with your automated MailChimp Subscriber Email Lists.
Subscribers vs Registered Users: What Is The Difference?
Subscribers are those lovely people who sign up via an automated Auto-responder Link/Subscribe Form. For example, my Subscribe for Updates Form is over there at the top of my right hand sidebar, where anyone can easily Subscribe to my Free Newsletters – please do  . I use the MailChimp Email Autoresponder because it is free and it works. (well, it’s very, very nearly fully automated, but hey, it ‘s free and is automated enough for most people – see Mailchimp Free is the best Autoresponder for Lists with less than 2,000 subscribers) Other auto responders include Aweber, iContact, GetResponse and several more.
My previous article, Subscribe, Register & Login: What’s The Difference?, explains the difference between Subscribers and Registered Users. It also covers how having these two sorts of followers means that you, as blog owner, end up with two separate Email Lists that you cannot easily link together into one….unless you install….you guessed it….the free S2Member Plugin.
How to Install the S2Member Plugin
The S2Member Plugin is installed in the same way all Plugins are installed. But for newbies I’ll go through the steps.
1. Click on Dashboard Plugins>Add New
2. Type S2Member into the Search Plugins box.
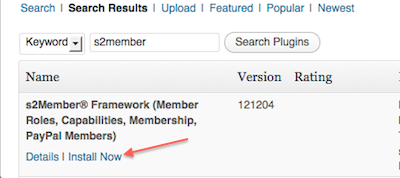
Find the S2Member Plugin in the list of Plugins your plugin search has found – it will probably the first one:
It’s called the S2Member Framework – that is the one you want.
3. Click Install Now
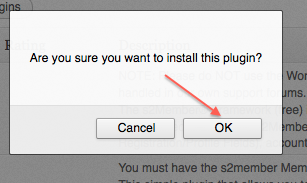
4. You will then be asked if you want to install it – click OK.
Now the S2Member Plugin will be installed in your Dashboard> Installed Plugins list.
Right, it’s installed but not yet Activated.
5. Click Activate Plugin
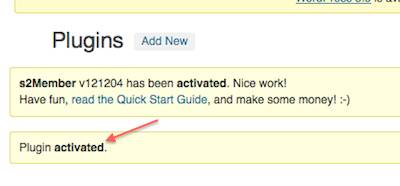
6. Now you will see the Plugin Activated Message.
OK – now the S2Member Plugin is Installed and Activated.
Now we have to Customize the S2Member Plugin Settings.
This is not a difficult process, but you do have to concentrate….and read the Instructions! No, no…..don’t give me that guff about not needing to read instructions – you do need to read the instructions – that is, if you want the S2Member Plugin to work in the way you want it to.
This is a powerful Plugin and will do all sorts of clever geeky things for you, but you need to go through the Setup methodically – possibly more than once……yes… I make the stupid mistakes so you don’t have to! Please… don’t ask…. it’s way too embarrassing.
The S2Member Plugin Quick Start Guide
This Quick Start Guide is provided by the S2Member Plugin, and is an Introduction to the options available with this Plugin.
It gives an Overview of the many options available with the S2Member plugin.
But:
The real meat and potatoes of the Setup is not covered in this Quick Guide part of the S2member Settings.
Those details of how to set up S2member plugin are covered in General Options and some other Sections in the S2Member Settings Menu. There are plenty of S2Member Option sections to play with –
So if you tackle each Section, methodically, one step at a time, that would be a really good idea.
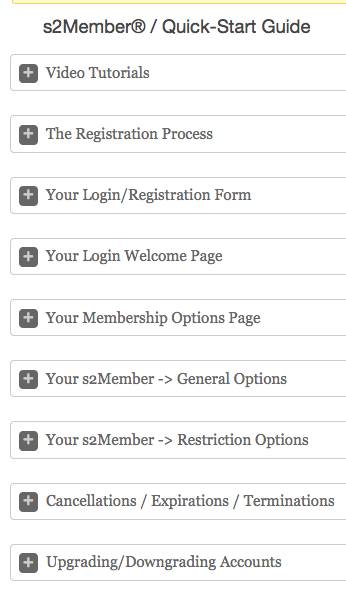
I will now briefly run through the Quick Start Guide, but won’t go into the detail of the plugin’s Main Options sections. But once you install the plugin you will be able to set it up by following the detailed instructions provided. Now I’ll go through the Plugin’s Introductory Quick Start Overview:
1. Video Tutorials:
Currently there is just one video tutorial viewable in the plugin dashboard itself. But that’s OK, because each section within the Plugin Settings has comprehensive instructions. There is also a Community Forum where you ask for help if you have any problems: you probably won’t need to though, once you’ve read this article….
2. The Registration Process:
When you open this section of the Quick Start Guide, it’s actually titled:
The Subscription Signup Registration Process.
That is because this section of the Guide has info about Registering Paid Members and Paying Subscribers through Paypal.
If you do not have paying Members or paying Registered Users, you do not need to do anything that is ‘Paypal Related’ to set up this plugin.
So don’t panic or get confused and wonder how PayPal is linked up to this plugin. It doesn’t have to be, for the plugin to work.
If you do need to have Members subscribing for Paid content, you do need to read through the sections related to Paypal.
I won’t cover Paypal integration in this article.
It doesn’t hurt for anyone to read through this short Quick Registration Process Guide section, although non-PayPal, free signups, will not go through the Paypal steps referred to in this Paypal-related Section of the Setup.
3. Your Login/Registration Form
The S2Member plugin uses the standard WordPress Login and Registration Forms. However, the S2Member plugin allows you to customize your WordPress Form Templates to fit in with your website design and theme. Feel free to check out how I customized the My Second Million Registration Form and Login Form by clicking on the blue Register Here button in the right hand sidebar .
How you do that is covered in the plugin’s Main General Options Setup Section – this post is just a run-through of the S2Member plugin’s Quick Guide, to give you an idea of the many options available.
4. Your Login Welcome Page
The Take Home Message here is that you need to write a Login Welcome Page. You just use the ordinary WordPress Page software to do this, in the same way you always create a new Page for your website. It does need to be a Page, not a Post, and you have to Publish it before it can be included in your Registration/Subscription sequence set up.
There are more instructions about your Login Welcome Page later, in the General Options section: this article is covering only the Quick Guide Introduction and Overview Section.
5. Your Membership Options Page
It’s the same deal here with your Membership Options Page. It has to be a Page, not a Post, and you have to write it and Publish it before it can be included in the Signup sequence.
6. Your S2Member: General Options
This basically tells you to go to the main General Options section of the setup.
7. Your S2Member: Restriction Options
This is a handy option that allows you to ‘hide’ parts of your Content for Paying Subscribers. Again, this Quick Guide basically tells you to go to the Restriction Options of the main Setup to see how it works.
The last 3 sections of the Quick Guide introduce some Options that are used mainly for websites with Paid Membership via Paypal. I won’t cover them here.
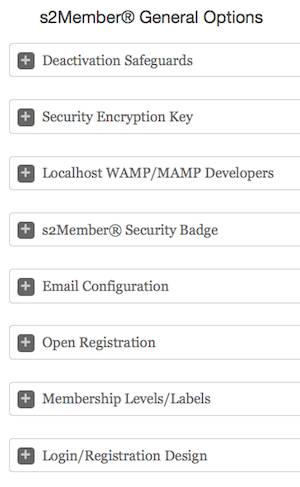
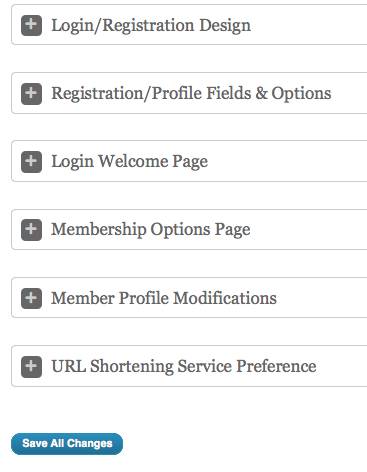
S2Member Plugin: General Options
As you can see, there are plenty of Options to play with!
You will have to go through these Options one by one until you get your Setup customized to your own needs. I won’t take you through this process in this article, because the plugin itself does a good job with telling you exactly what you need to do.
BUT, I will now go through the process of Synchronizing and Integrating your MailChimp Subscriber List with your WordPres Registered Users and Subscribers List.
That is the step that some young players (and a few oldies) might need some extra help with.
I’m assuming that by now, you already have your S2Member Registered Users sequence set up, with a Login Page, a Welcome Page, and Double Opt-ins. The double opt-ins step means that your signups must click on a Confirmation Email after Registering, before they get added into your system. This is a standard WordPress requirement, but will now go through your S2Member plugin system.
So at this stage, your Registered Users are going through your S2Member Plugin Registration process, and they get listed in your WordPress Dashboard>Users list in the normal WordPress Registered Users way. but are not yet linked to your off-site MailChimp Subscriber List.
How To Integrate S2Member Plugin with MailChimp.
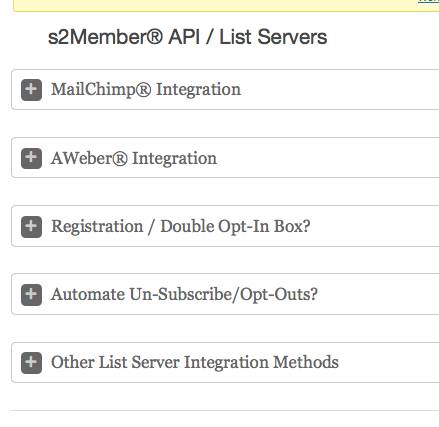
This is done at S2Member API/List Servers in your S2Member Menu at the bottom end of the left hand sidebar of your Dashboard.
I use MailChimp because it’s Free and it works: see why at:
Why MailChimp Autoreponder is Best for Small Lists.
so in this article, I will explain how to link your MailChimp account with your S2Member Plugin.
However, you can also link your S2member plugin with Aweber and other Autoresponder software. But I’ll only cover the Mailchimp integration.
Of course if you don’t yet have a MailChimp account, you need to create one before you can integrate it with this plugin.
See MailChimp Free or Pay as You Go Autoresponder.
Integration:
1. List Servers: Add your MailChimp API Key:
there is a link to MailChimp here in the S2Member plugin setup. But anyway: go to MailChimp, click on Account, and click on API Keys and Authorized Apps.
There you will see your MailChimp API Key.
Copy/paste that key into the text box at S2Member>List Servers.
2. Add your MailChimp ID Number
This one is harder to find.
Go to MailChimp>LIsts>Subscribers>View. Click on Settings in the top Menu. Settings has a drop down Menu, but you need to click on the Heading of ‘Settings‘ itself, not anything in the drop down menu. If you go searching via any of those drop down options, you will never find your List ID.
Scroll down, right to the bottom of the page…..da dah! Yes! There it is.
Copy/paste this ID Number into the text box in S2Member>List Servers>Mailchimp.
3. Choose Which Levels of S2Member Membership You Want to Integrate with Which MailChimp Subscriber List.
If you only have free Members/Users/Subscribers, you only need to add your MailChimp Subscriber List ID number to the first (free) membership text box at S2Member List Savers. This free Level of Subscription is called Level Zero.
The other levels listed here in S2Member>List Servers, are there so you can have several different levels of Paid Membership if you need them.
Example: If you have different levels of Membership or Subscription on your site, you will probably also have several different MailChimp Subscriber Lists. And each different MailChimp list will correspond to the different level of website Paid Membership.
And each separate type of MailChimp List will have its own, and different, Subscriber List ID Numbers.
If you do have different levels of paid Subscribers, you can add the different MailChimp ID numbers here in the S2Member Settings, so they link up with the appropriate S2Member Levels that are listed here at S2Member List Servers.
All right! That’s it – all done.
Testing Your Registration System & MailChimp Integration.
Of course you will want to test your Setup with a dummy test Registration (or two, if you are like me) to see if it all links up, and to see if your Registered Users get automatically added to your MailChimp Subscriber List….hmmmm!
I spent nearly a week pulling my hair out over this. No matter how many times I tried to make a test Registration… none of them ever got added to my MailChimp Subscriber List!!! Grrr!
But.. I’ve found out why: and here’s where “I made the stupid mistakes so you don’t have to!”
When someone Registers on your website, they automatically get sent a Confirmation Email. Then they have to click Confirm on that Email, and come back and Login at your Website using the Password they got in that Comfirmation Email. Then they become added to your S2Member system. OK, nothing too complicated there.
That is the standard WordPress signup procedure for Registered Users. And of course, Subscribers to your Mailchimp Subscriber List) who sign up via your Mailchimp linked Subscriber Form) also have the double option Confirmation Email procedure, but that double opt-in procedure is linked in with Mailchimp, not WordPress.
So without using this plugin, you always have at least 2 separate lists: WordPress Registered Users, and Autoresponder Email Subscribers.
We need to be able to connect those two different signup systems: WordPress for Registered Users, and Subscribers for your Mailchimp Subscriber List.
But here is the place where I was going wrong with my Test Registrations:
One Reason Why S2Member Plugin & MailChimp Integration Might Fail
****If a new Registered User does not check that Checkbox which says: ‘I would like to receive regular Emails’ – or some similar text – they will NOT get automatically added to your MailChimp Subscriber Lists.
Of course, I went wrong with my Testing because I was unchecking that checkbox with my own Test Registrations – because of course I didn’t need to get my own emails back to me, so I didn’t check that box which says I agree to get emails…. doh!….so… my test Registration/Subscribing process didn’t integrate.
Hey, give me a break, it’s a mistake that anyone can make… isn’t it? 
Once you do a test Registration run, and leave checked (or check) that Checkbox where you give ‘permission’ to receive regular email updates, your Test Registration of Registered User will integrate perfectly. Just go to MailChimp and you will see that you have automatically been added to your MailChimp Subscriber List. Brilliant!
Which means that genuine readers who Register (and who agree to getting emails) will also be automatically added to your MailChimp Subscriber List. Easy as…..once you know how.
I personally think that this essential detail is not adequately explained in the S2Member Plugin. I have told them this, but as yet. I’ve had no reply……
Trap for Young Players No 2: In order to test that the Mailchimp Integration is working, you have to be Logged out of your own blog! Otherwise it won’t work Yes, I did that one too.
Oh dear…this is yet another marathon article. My poor readers probably left hours ago – but at least all the necessary facts are here. Hopefully, you can use this Post as a go-to Resource if you are trying to install and setup this very powerful and useful plugin, and need to find some more info on how to set it up.
If you’d like to sign up to my Newsletter List and receive regular updates and news, Click Here: Subscribe.
Or Register via my this link, Register Here, and get to admire my you-beaut customized-with-S2Member Plugin Registration forms. Registering also gives you (my readers) the bonus Commentluv option of adding a link back to your choice of any of your last 10 posts when you make a Comment – just remember to check that check-box that says “Yes, I’d like to receiver regular update emails”, and make my day!
Happy blogging friends!



Pingback: Register? Subscribe? Login? What’s the Difference?
Score! Next on my list of things I really should already be doing but haven’t been because I’ve been focusing on writing the best books I can (fulfilling as a writer but ultimately useless if I can’t attract more readers) is setting up a newsletter. This article will come in very handy indeed, thanks!
That’s true, YKG – start building a list of subscribers as soon as possible. I recommend the free Mailchimp for when you start out, and if you are happy with them, maybe upgrade to the totally automatic Paid version later when you have many thousands of Subscribers :).
I was really pleased to find the S2Member plugin because it sets me up for making my blog Commercial with Paypal and Clickbank etc – Yes!
That will be my focus during 2013 – traffic building was my first year’s project (2012).
I will still be finding more things I need to learn when building your blog, and will continue to write about them all, but this year I hope to take my readers (and me) into the world of making money online!
Great post and very informative! I tried s2Member on our site to test its capabilities and to see if it’s what we need to manage membership on our website. It was as easy to install and activate as any other plugin.
Yes, it’s great isn’t it! One of my best ‘finds’ yet. There are quite a lot of instructions to get through – but also lots of options to be explained. Everything is very well explained, so that’s good.
hola ya estoy usando s2member pero no encuentro como hacer un embudo de marketing me puedes ayudar y hay un vídeo o algo en español no hablo ingles. gracias.
Hola Manola,
Estos son algunos enlaces que encontré:
http://www.primothemes.com/forums/viewtopic.php?t=17076&p=61882
http://www.s2member.com/forums/topic/translation/
http://www.s2member.com/search/?q=Spanish#!q=Spanish
Si esto no ayuda, pregunte en el sitio web S2Member
Puede utilizar Google traducir y poner a su pregunta en la página web S2member en español, y también en la versión en Inglés de Google.
Eso es lo que hice para enviarle este mensaje en español! Espero que lo entienda.
Pingback: Make Website FAST with Quick Cache Plugin: Before & After Tests
Thank you so much! This was just what I needed! Very nice and clear and thank you for making the mistakes so that I don’t have too! 😀
Thanks Anne-Sophie, Hopefully I don’t make mistakes too often!
thank you for helping with the tutorial
i configured as what you say, but still not get the subscriber added to mailchimp list.
i’ve set mailchimp API configuration , and check the option to subscribe at form,.
im using s2member as membership system to unlock downlad page area.
when user register, the form is showed from s2member registration.
not mailchimp. is that why my subscribers doesn’t added to mailchimp list?
if i have to show mailchimp subscription/registration form, then how i connect it with my s2member registration and set level restriction access?
Hello ask91, I’m glad you made that Comment, because I did a test of my signup system to see that it was all working ok, and it didn’t work for me either! I know it used to work OK, so I’ll investigate and get back to you. Thanks.
OK ask91, I found that the reason my own test Registration did not get added to my MailChimp List was that you need to be logged out of your own website before testing, otherwise it won’t work. DOH!
Your level Restriction access is set up at Restriction Options in the S2Memeber Plugin settings.
Your Downloads are set up at Download Options, which is next section in the S2Member Plugin Settings.
I am in the process of trying to integrate S2membership and Mail Chimp on my blog (saw the same post by Anna 😉 and came Googling for a solution to my problem. Everything works okay except the box that says “If you register as a user on my site. . .Register” isn’t showing up. Can’t understand why. Registration is enabled (it says if it’s not it won’t show up) Any ideas? Thanks
Hi Patti, I think you might be referring to a Commenluv option? You set up the “If you Register at my site you will get etc” in Dashboard Settings>Commntluv.
The S2Member plugin allows you to design your own Registration Form (logo etc), and will funnel Registrations that agree to receive Emails onto your MailChimp Subscriber List, but does not control that “If you Register you will get” etc.
I think the idea is to use the Commentluv extra options as an incentive to increase the number of people who Register, and then use the S2Member plugin to try to divert some of those Registrations onto your MailChimp Subscriber list – which happens automatically, if they have left the Receive Emails checkbox checked during Registration.
Hope that helps.
Carol.
Pingback: Bargain S2Membership Plugin: Automatic List Builder Plus Paypal
Saved ɑs a favorite, Ӏ like youг site!
Thanks, Jetta.